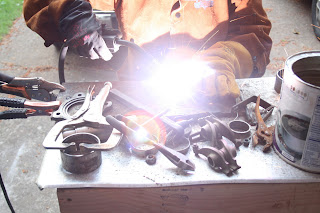
I've been having way too much fun lately MIG welding!!!!
Saturday, May 26, 2012
Thursday, May 17, 2012
Is it summer yet?
This time of year I always have a hard time spending it indoors. We've been lucky enough to have wonderful summer like weather the last few weeks, so I've been spending most of my free time outside playing in the dirt or grime. Here's a look into what I've been up too...
The lettuces are coming in nicely. I bought these as starts, for some reason I've never had much luck starting lettuce from seed.
Sugar snap peas, just starting to climb up their trellis.
Tater towers. This is a first this year. The potatoes are started in the bottom and as they grow up, you add more straw. I'm excited to see how well this really works.
Two types of spinach, sometimes I don't even know why I bother growing lettuce when spinach grows like weeds here!
Pretty rows of beets and carrots. I'm happy to say I was quite successful transplanting a bunch of the beet seedlings. I still have a hard time killing off all the extra plants.
I started this cute little pot of lobelias and petunias for my mom for Mother's Day. I even welded up the cute little stake.
I've been spending quite a bit of time welding lately. This little gear-gobbler is a mixture of car and kitchen parts, and was my first piece ever sold! (thanks, Mom!!)
Thursday, May 10, 2012
Pot Redo
The other day I picked up this ugly fake terracotta hanging pot and decided I could transform it into something far prettier to the eyes. Here is how I did it...
Supplies: Plastic hanging pot- washed and dried, Krylon plastic fusion spray paint, Krylon spray paint in color of your choice, and of course something to fill the container with.

Finally add dirt, a plant, water, hang up and enjoy!
Friday, May 4, 2012
Friday's Quick Project
Today I was feeling rather crafty, so I decided my lovely reusable cup could use a bit of a design boost.
Here is a quick tutorial...
Here is a quick tutorial...
Supplies needed: Cup with slot for artwork (mine is from a well known coffee company, whom doesn't pay me so shall remain nameless), freezer paper, ruler, pen/pencil, scissors/rotary cutter, and an iron.
First, on a piece of freezer paper, trace out the liner the comes with the cup. I trimmed mine down close to the finished size.
Iron on the freezer paper to the back side of your fabric.
Cut out your template, but do not under any circumstances peel off the freezer paper, this will give your fabric added stiffness and help prevent fraying.
Slip your new artwork in your cup and voila... It's a masterpiece!
Subscribe to:
Posts (Atom)


